Claude Fable 5.2 Blender MCP Workflow (2026)
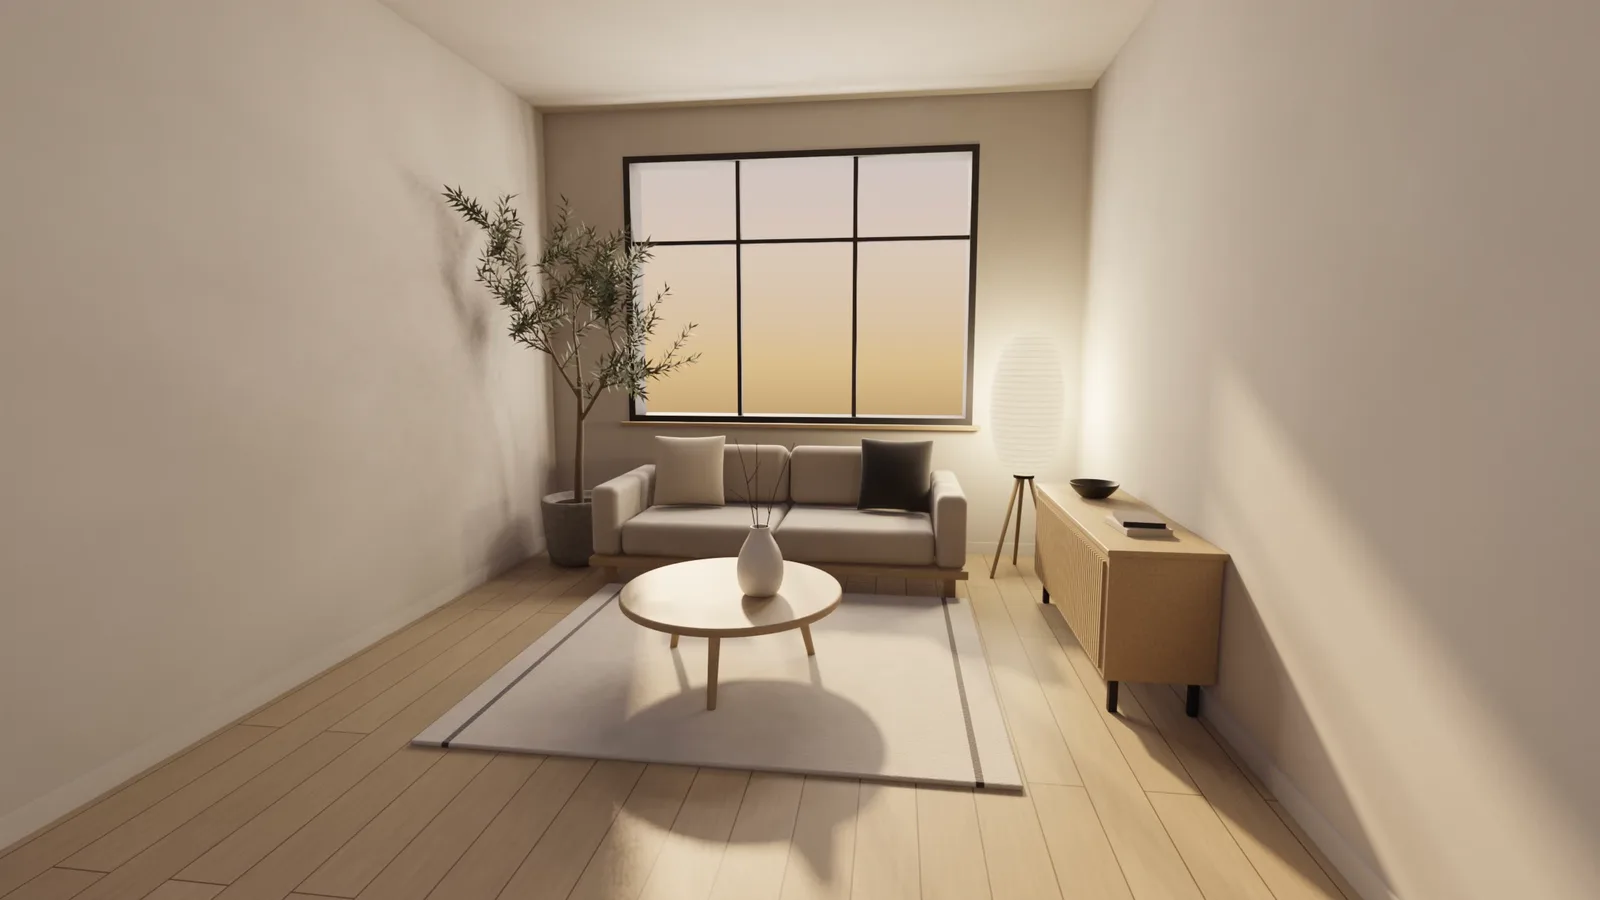
You can now describe a room in plain English and watch Claude Fable 5.2 build it in Blender: the walls, the furniture, the materials, the light and the camera. This is the workflow behind our Lumen room video, adapted for the Claude Desktop app and stripped of everything a first-timer doesn’t need.
Guide: AIPublished 10 November 2026, 10 min read, by Joep de Kok, founder of Geekie Creative & IT · Lees dit artikel in het Nederlands
What you are setting up, in plain words
Claude can talk to Blender once a small connector sits between them. Blender is the free program where 3D scenes are built and rendered. Claude Fable 5.2 is the model that does the thinking and writes the instructions. The MCP (Model Context Protocol) is a standard way for an AI assistant to use outside tools, and the Blender MCP is the version made for Blender: a free connector from Blender’s own lab.
It has two parts that talk to each other: an add-on that runs inside Blender, and a small server that your AI app starts in the background. You don’t have to understand that. You install both once, and from then on you just chat. Our room is Japandi, a calm mix of Japanese and Scandinavian style.
We built our room in Claude Code, in a terminal, and have not run the desktop route ourselves. The desktop steps below follow Blender Lab’s and Anthropic’s published instructions. New to Claude itself? Our article on what Claude AI is (in Dutch) is a good start.
What you need before you start
You need three things, and only the Claude plan costs money.
- Blender 5.1 or newer. It’s free from blender.org, and the MCP add-on needs at least version 5.1. We used Blender 5.2.3 LTS, the long-term-support release.
- A Claude plan that includes Fable 5.2. Anthropic lists it for Pro, Max, Ultra, Team and Enterprise users.
- The Claude Desktop app for Windows or Mac, signed in to that plan.
- Possibly Python 3.10 or newer and uv. The Blender MCP bundle runs on them. Step 2 explains what to do if Claude Desktop says they are missing.
Setup is a few downloads and clicks. Building and rendering our room took about 26 minutes on top of that.
Safety first. Blender Lab is explicit that the MCP server runs AI-generated code in Blender “without any guards” that would protect your data. It suggests a virtual machine (a separate, sealed-off computer running inside your own) or a computer without sensitive information on it. At the very least: start from a new Blender file, keep your real projects closed, and save copies.
Step 1: install the MCP add-on in Blender
By the end of this step, Blender is listening for Claude.
- Open Blender. If Blender’s online access is turned off, first turn on Allow Online Access under Edit > Preferences > System > Network. The add-on install downloads from Blender’s lab.
- Open the Blender MCP page in your browser.
- Drag the “Drag and Drop into Blender” link from the page into the Blender window, then do it a second time. The first drop adds the Blender Lab extensions repository; the second installs the add-on, with update notifications.
- Prefer not to drag? Download the zip from the same page and use Install from Disk in Blender’s extension preferences.
- Go to Edit > Preferences > Add-ons, find MCP, and open its panel.
- Click Start MCP Bridge Server. This is the Blender half of the connection; Claude Desktop starts the other half for you.
Check: The panel now says “Server is running”. The same panel has an auto-start option, so you don’t have to click the button every time you open Blender.
Step 2: connect Claude to Blender
By the end of this step, Claude can see inside your Blender scene.
- Download the latest .mcpb file (an MCP bundle) from the Blender MCP releases page.
- Open the Claude Desktop app and go to Settings > Extensions.
- Drag the .mcpb file onto the Extensions page, or double-click the file, then click Install. The Claude Help Center also lists an “Install Extension…” button under Advanced settings.
- Start a new chat and pick Claude Fable 5.2 in the model menu.
The bundle runs on Python 3.10 or newer through a small tool called uv (see manifest.json in the mcp folder of the official repository). If Claude Desktop reports that Python or uv is missing, install Python from python.org, then install uv with the one-line command astral.sh shows for your system, and restart Claude Desktop. The first time Claude uses the Blender tools, the app may ask for your permission; allow it.
Check: With Blender open and the server running, ask: “Which objects are in my Blender scene?” A fresh Blender file comes back with the default cube, camera and light.
Comfortable with a terminal? That’s how we ran our own build, with Claude Code: install the server with pip install "git+https://projects.blender.org/lab/blender_mcp.git#subdirectory=mcp", then add it with claude mcp add blender -- blender-mcp.
Step 3: describe the room in one message
By the end of this step, Claude has everything it needs to build the whole room without asking you twenty questions.
First, save the new Blender file (File > Save As) in a new folder, for example Documents/my-room/room.blend. Leave the default cube; Claude’s script clears the scene. The brief below asks Claude to save the scene and every render next to it.
The single biggest lesson from our build: describe the room the way you would brief an interior designer, then tell Claude how to work. Copy this template, swap in your own room, and send it.
Room brief for Claude
In the open Blender file, build a Japandi living room from scratch.

The room: about 3.5 m wide and 6.6 m deep, 2.9 m high, a large window in
the back wall, light oak floorboards, warm off-white walls.

The furniture: a low linen sofa on an oak plinth with two cushions, a round
oak coffee table on three legs, a slatted oak sideboard against the right
wall, a tall paper floor lamp on an oak tripod, a matte white vase with dry
branches, and an olive tree in a stone pot.

The mood: early evening. Low warm sun through the window, and the paper
lamp switched on.

The camera: portrait (1080 x 1920), at standing eye height, looking at the
window wall.

How to work:
- Put everything in one Python script that clears the scene and rebuilds
  it, so every change is repeatable.
- Make all materials inside Blender. Don't download anything.
- Check the Blender documentation before using settings you're unsure of.
- When the first version stands, make a test render, look at it, and fix
  what's wrong before you tell me it's done.
- Save every test render as a PNG in the same folder as the .blend file.
- Save the .blend file when you're done.
Why the “How to work” part matters, in plain words:
- One script that rebuilds everything means a change (“make the sofa wider”) never leaves half-old leftovers behind. Our room was exactly that: one script, run top to bottom, with nothing imported or downloaded.
- Checking the documentation helps because Blender changes between versions. The Blender MCP ships with Blender’s manual and Python API reference, so Claude can look things up. In our recording, Claude reported “Checking the Blender 5.2 API details (Eevee settings, colour transforms)” before it wrote the script.
- Test render, look, fix turns a rough first version into a good one, without you spotting every problem yourself.
Step 4: let Claude build the room and check its own work
By the end of this step, you have a finished, saved scene. Your job here is mostly to watch.
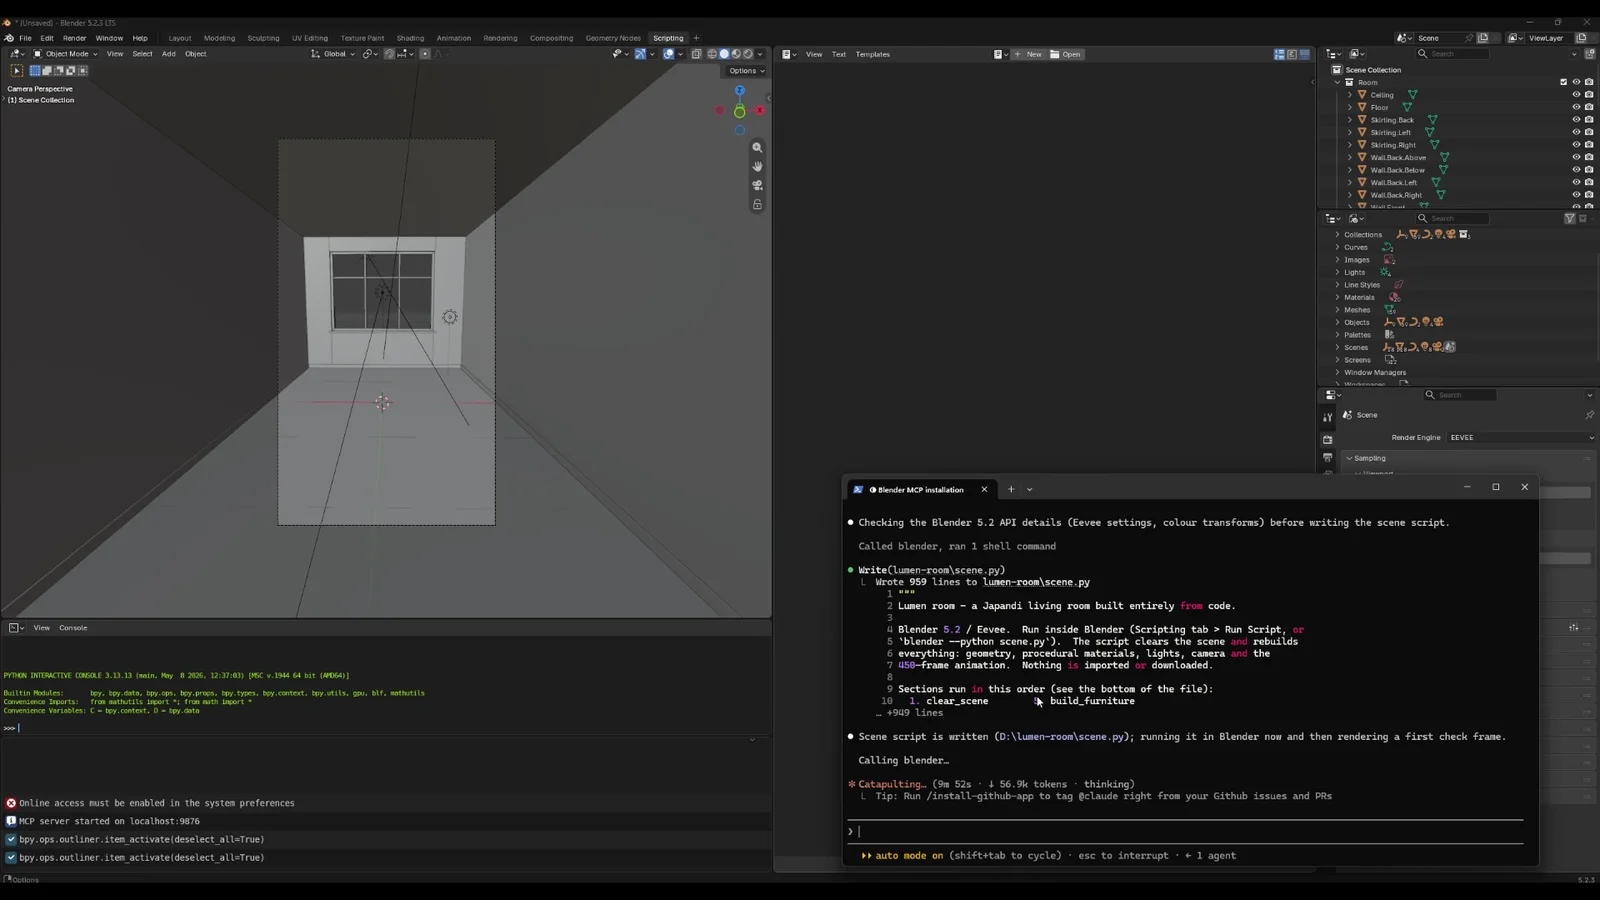
Here is what happened in our run, so you know what to expect:
- Claude read up on the Blender version it was talking to.
- It wrote the scene script: 959 lines on the first pass, describing every wall, plank, cushion, light and camera move.
- It ran the script in Blender, and the room appeared as grey shapes in the viewport.
- It made a first test render, looked at it, and wrote down what was wrong.
- It worked through those fixes, checked again, and saved the .blend file.
The fourth point is the one that surprised us. After its first test render, Claude reported on its own:
Fixing what the first check render showed: flat lighting with no visible sun pool, a cropped sideboard, a sparse tree and a bright outline round the window.
Nobody had pointed those out. A few minutes later it moved the olive tree away from the wall and checked the final frame with the lamp on.
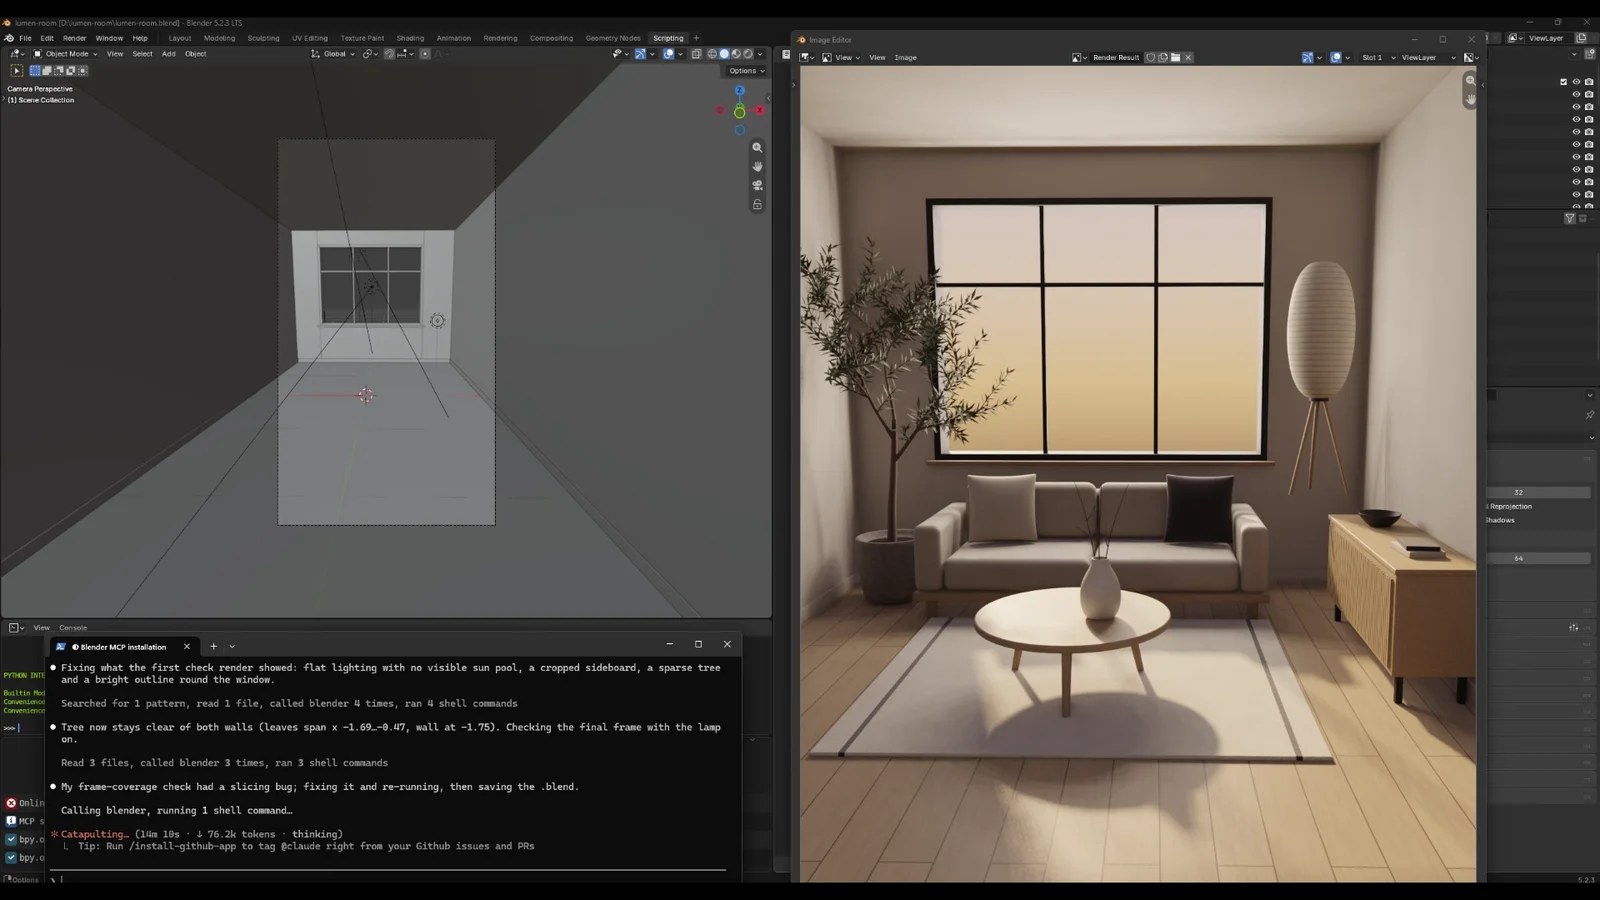
Check: Claude tells you the scene is saved, and a test render looks like a room, not a pile of shapes. If you don’t see an image, ask: “Show me the latest test render.” If Claude can’t show it, open the newest image in your project folder yourself and describe what you see, as in step 5.
Step 5: give feedback like a designer, not a programmer
By the end of this step, the room looks the way you pictured it.
You don’t need technical words. Describe what you see and what you want instead:
- “The room feels too dark. Make the evening light warmer and switch the lamp on.”
- “The plant touches the wall. Give it some space.”
- “The camera is too high. Lower it to eye height and include the whole sofa.”
- “Make the sideboard a little longer and put a dark bowl on it.”
Ask for one or two changes per message, and ask for a new test render after each round. Because everything lives in one rebuild script, Claude changes the script and runs it again, and the whole room stays consistent.
Step 6: render the final image or animation
By the end of this step, you have a file you can post.
For a still image, ask: “Render the final frame at full quality and save it as a PNG next to the .blend file.” For movement, describe it like a short film: “Animate the furniture dropping softly into place over 15 seconds, then render the animation as an MP4 video and save it next to the .blend file.” Naming the MP4 matters: otherwise Blender’s default is a folder of separate images.
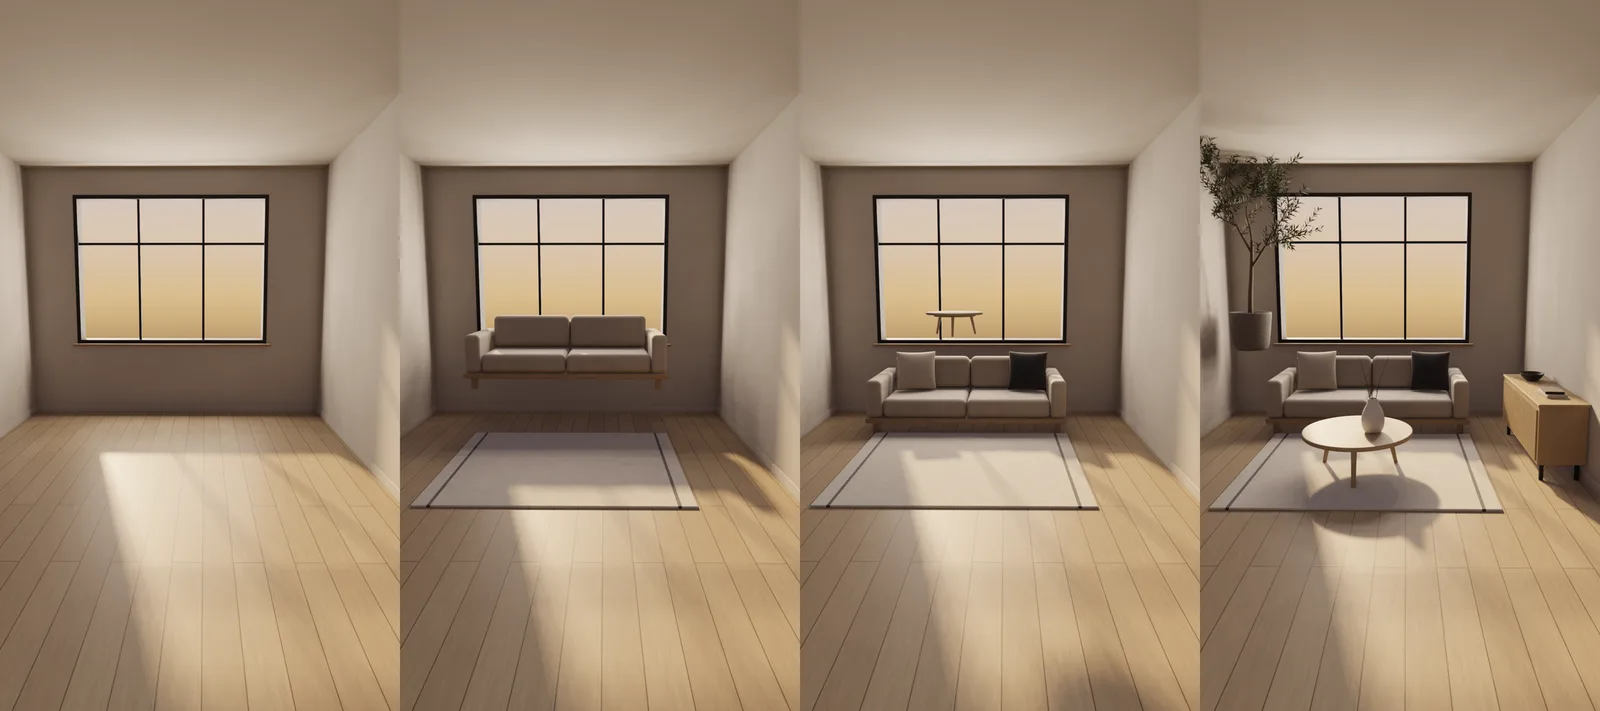
In our run, Claude first spent about 14 minutes building and checking the scene (our first brief already included the animation); the timer in our recording read 14 minutes 10 seconds as it was saving the file. Blender then rendered the animation, 450 frames (15 seconds at 30 frames per second) with its fast Eevee engine, in about 11.5 minutes, around one and a half seconds per frame. That was on our desktop PC: NVIDIA GeForce RTX 3070, AMD Ryzen 7 5800, 32 GB of memory.
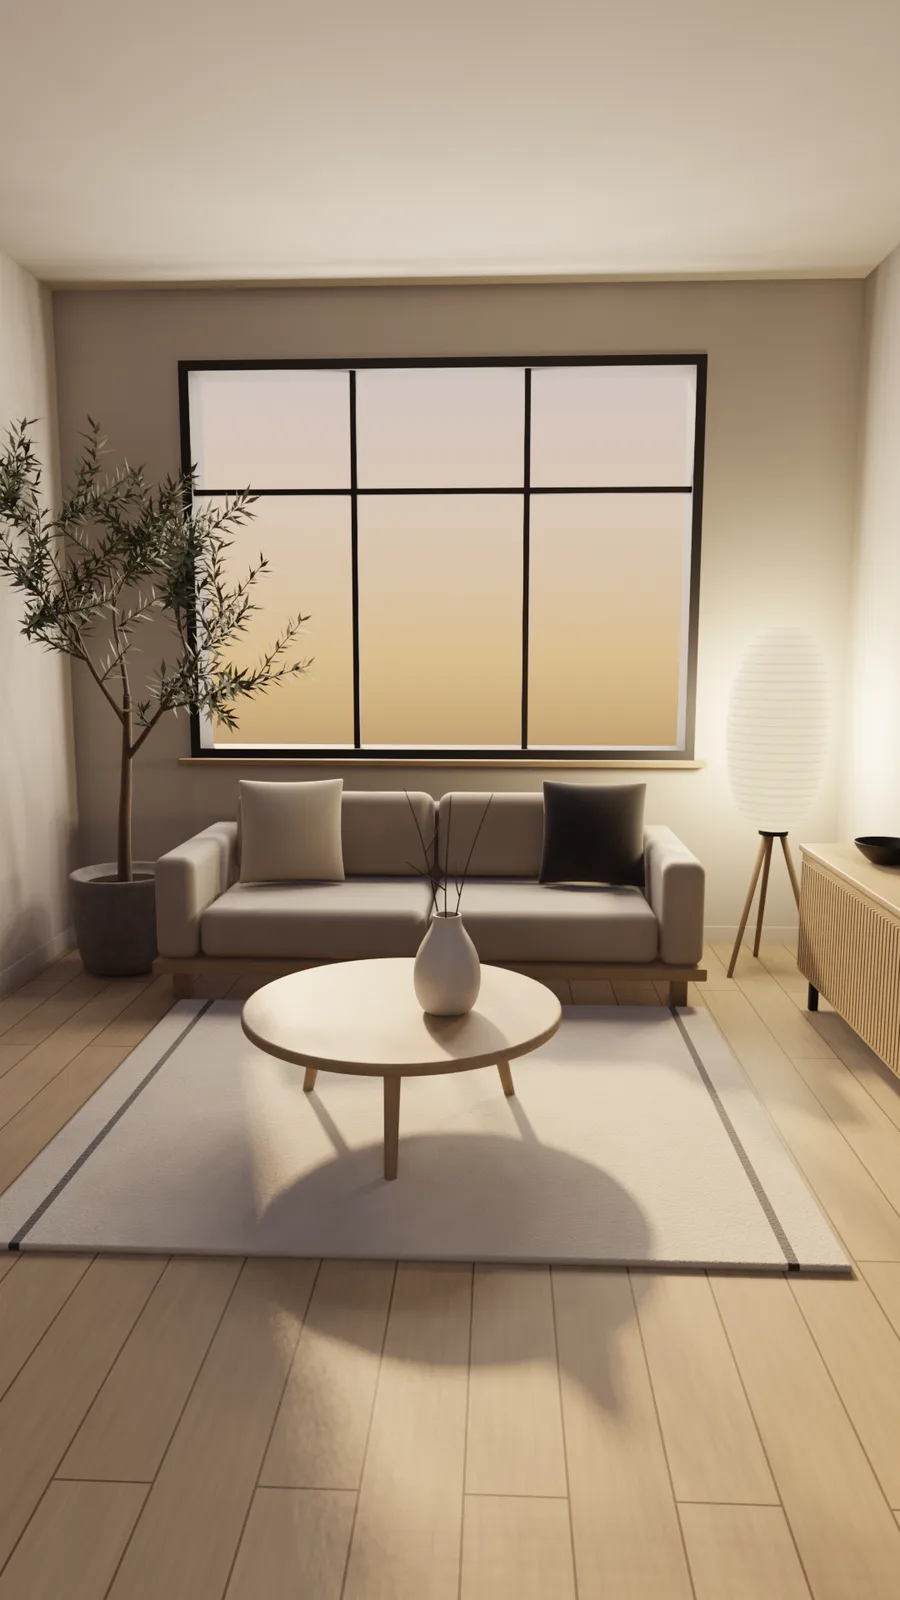
Check: Open the saved image or video. If something is off, go back to step 5. It’s one more message, not a restart.
What we left out, and why you can too
Our own pipeline had more moving parts, because we also made a video about it. Here is how the route in this guide compares with the one we ran:
| Topic | Claude Desktop (this guide) | Claude Code (our run) |
|---|---|---|
| How Blender gets connected | Install the .mcpb bundle | claude mcp add in a terminal |
| Terminal needed | Only if uv is missing | Yes |
| Run by us | No, follows the official instructions | Yes, the Lumen room |
None of the extras below is needed to get a room:
- The terminal and Claude Code. We used them; the desktop app is the easier way in for most people.
- Reading or editing the script. Claude writes it, runs it and fixes it. You judge the pictures.
- Contact sheets and render logs. Useful for a production team, unnecessary for one room.
- The video edit (the laptop scene, the music, the website at the end). That’s a separate project.
Common mistakes to avoid
An older Blender
The add-on needs Blender 5.1 or newer. Update Blender before anything else.
Online access switched off
If the drag-and-drop install fails, turn on Allow Online Access (Edit > Preferences > System > Network) and drag the link again.
Forgetting to start the server
If Claude says it can't reach Blender, open the MCP add-on panel and click Start MCP Bridge Server, or turn on auto-start.
Two Blender MCP add-ons at once
If you tried a community Blender MCP add-on before, switch it off, so only one connector talks to Blender.
A vague first message
"Make a nice living room" gets you a generic room. Sizes, materials, furniture, light and camera get you your room.
Working in a file that matters
The Blender MCP runs code without guard rails. Always start from a new file or a copy.
Frequently asked questions
Do I need to know how to code?+
No. Claude writes and runs all the code. You describe the room and react to the test renders. Knowing a little Blender helps you look around the result, but it isn't required.
Can I use the free Claude plan?+
Not for this model. Anthropic lists Claude Fable 5.2 for Pro, Max, Ultra, Team and Enterprise plans.
How long does a first room take?+
In our run, building and checking took about 14 minutes and the 15-second animation rendered in about 11.5 minutes. A single still image renders in seconds on a PC like ours (our animation averaged about 1.5 seconds per frame). Setup adds a few downloads and clicks.
Will this use up my Claude plan?+
It counts toward your plan's usage like any long conversation. A build like ours is one long session, so start it when you still have room in your limits.
Is it safe?+
It's as safe as letting someone else run code on your computer. Blender Lab warns that AI-generated code runs without guards and recommends a virtual machine or a computer without sensitive data. Use a fresh file, close other projects and keep backups.
Sources and how we made this guide
We built the Lumen room ourselves in Claude Code with Claude Fable 5.2 on Blender 5.2.3 LTS, and took every number here from our own scene script, screen recording and render log. The Claude Desktop steps follow Blender Lab’s and Anthropic’s published instructions. All sources were checked on 10 November 2026. Built your own room? Post it and leave a comment under our video, or send it to us.
- Blender Lab: MCP Server (requirements, install, safety note)
- Blender MCP source and releases (README, mcp/manifest.json)
- Blender manual: System preferences (Allow Online Access)
- Anthropic: Claude Fable (plans)
- Claude Help Center: local MCP servers on Claude Desktop
- Our own project files: the scene script, the screen recording and the Blender render log
Share this article
See more of Geekie on Google?
Pick Geekie as a preferred source, and Google will show you our articles more often in Top stories.
Pick Geekie as a preferred source (opens in a new tab)Further reading
Is your website pulling its weight?
Geekie builds websites that get found in Google and in AI answers, for a fixed price. Tell us about your site and we will tell you honestly what would help.